


Create a super fancy api with grape.
Today we're gonna do an RESTful API in Ruby on Rails. Are you ready? So without further ado... let's go!
The beginning: the app where your data is
Our RESTful API only will have sense inside an 'real app' with 'real data', so let's make a simple one. For this, as I had done on my first post, we'll use rails apps composer. As I explained there, we'll have to follow these steps:
$ mkdir myapp
$ cd myapp
$ rvm use ruby-2.2.2@myapp --ruby-version --create
$ gem install rails
$ gem install rails_apps_composer
$ gem install rvm # (only needed if creating a project-specific rvm gemset)
$ rails_apps_composer new . -r core
After answering the questions that the gem makes us, we'll have our Rails application. We try to specify the most basic options. In my case I chose that I would generate a Rails application example, based on bootstrap framework, with only the home and about views.
Then we only need to do a couple of scaffolds, in order to make two models (in my case, Product and Review). This are the migrations for each one (don't worry, at the end I'll put links to the final example repo and Heroku demo, so you will have all the code):
class CreateProducts < ActiveRecord::Migration
  def change
    create_table :products do |t|
      t.string :name
      t.string :description
      t.string :image_url
      t.integer :price
      t.integer :stock

      t.timestamps null: false
    end
  end
end
class CreateReviews < ActiveRecord::Migration
  def change
    create_table :reviews do |t|
      t.string :title
      t.text :body

      t.timestamps null: false
    end
  end
end
So, with that, and creating some models and relations and adding some HTML and CSS, we'll finish with something like this:
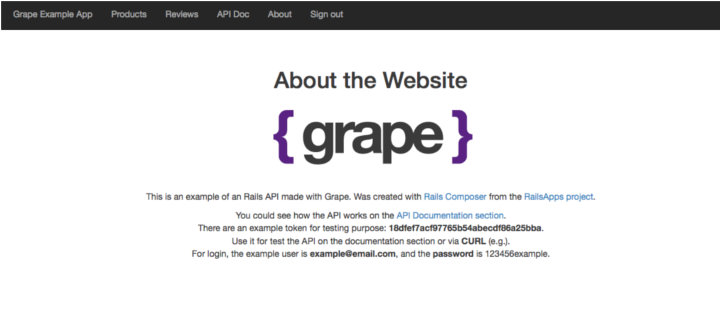
Home page
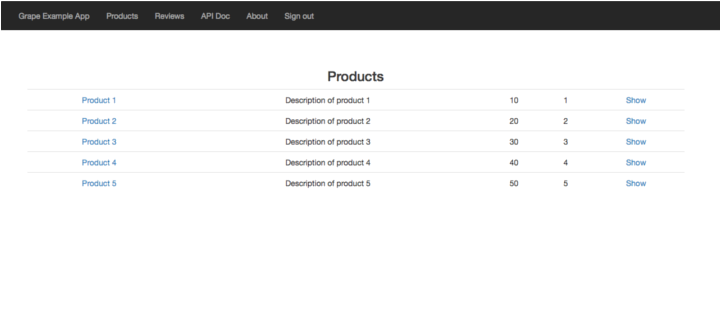
Product index
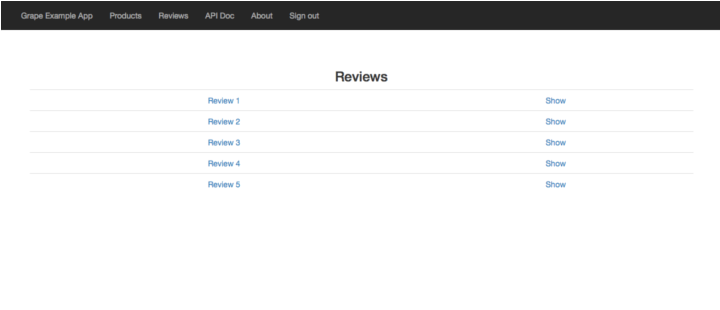
Review index
Ok, we have our very simple app. It's time to apify it! :D
Let's build our API with Grape
This is the real thing of this post. We're going to develop a RESTful API to consume our data wherever we want. In order to accomplish that, we're going to use Grape. Grape's own people defines Grape as follows:
RESTful-like API micro-framework built to complement existing web application frameworks by providing a simple DSL to easily provide APIs. It has built-in support for common conventions such as multiple formats, subdomain/prefix restriction, and versioning.
The Grape documentation in all his detail is available here. The first thing that we have to do is add the gem in our Gemfile:
gem 'grape'
and do the bundle install thing. Now, we'll set up our API file structure:
In the app directory, create an api folder, and inside, another folder with the name of the app (in order to keep all structured), until have something like that:
.
+-- app
|   +-- api
|       +-- grape_example_app
+-- bin
+-- config
|   +-- initializers
+-- db
+-- lib
+-- log
+-- public
|   ...
Don't forget to add this new folder (and subfolders) to the config/application.rb to load all the files inside on app init:
module GrapeExampleApp
  class Application < Rails::Application
    # Settings in config/environments/* take precedence over those specified here.
    # Application configuration should go into files in config/initializers
    # -- all .rb files in that directory are automatically loaded.

    # ...

    # API
    config.paths.add File.join('app', 'api'), glob: File.join('**', '*.rb')
    config.autoload_paths += Dir[Rails.root.join('app', 'api', '*')]

    # Do not swallow errors in after_commit/after_rollback callbacks.
    config.active_record.raise_in_transactional_callbacks = true
  end
end
Building the API
Grape APIs are Rack applications that are created by subclassing your API modules or classes under Grape::API. In order to maintain a minimum versioning of the API, on the main folder grape_example_app we're going to create a file, v1.rb, with this content:
module GrapeExampleApp
  class V1 < Grape::API
    version 'v1', using: :path, vendor: 'grape_example_app'
    # Specific content type to set UTF-8 and avoid codification problems
    content_type :json, 'application/json; charset=UTF-8'
    prefix :api
    format :json
  end
end
We set up our API module (GrapeExampleApp), define our Base class V1 (which inherits from Grape::API) and setting some Grape options like version, content_type of the API, prefix and response format.
Grape supports versioning. Future versions that we may develop as our application grows will then be nested inside version two, three etc... modules. The next step is create a subfolder v1 inside grape_example_app, and then creates inside this new subfolder the classes that will handle the API actions for our models Product and Review. At the end, we'll have something like this:
.
+-- app
|   +-- api
|       +-- grape_example_app
|         +-- v1
|           +-- product.rb
|           +-- review.rb
|         v1.rb
+-- bin
+-- config
+-- db
|   ...
The basic structure of our classes will be:
module GrapeExampleApp
  class V1::Product < Grape::API
  end
end
module GrapeExampleApp
  class V1::Review < Grape::API
  end
end
Ooooooook, so... we have the folder schema and the basic files. Now we're going to add some functionality to our base class with some helpers. For this basic example let's develop three basic helpers: api_response that will handle the API response format, authenticate! that will send an authentication error if the user doesn't authenticates properly, and clean_params to preprocess the params of the requests.
All the helpers have to be inside the helpers block, like:
helpers do
  # Some cool helpers here!
end
The code for the first helper, api_response, will be:
def api_response response
  case response
  when Integer
    status response
  when String
    response
  when Hash
    response
  when Net::HTTPResponse
    "#{response.code}: #{response.message}"
  else
    status 400 # Bad request
  end
end
As you could see, the only purpose of this helper is get the response of the API model, and return it with some status if correspond. The code for the second helper, authenticate!, will be:
def authenticate!
  error!('Unauthorized. Invalid or expired token.', 401) unless current_user
end
Throughs an error exception if current_user is nil. The code for the third helper, clean_params, will be:
def clean_params(params)
  ActionController::Parameters.new(params)
end
We only have to complete a couple of details more to finish our base class, specified that we allow CORS requests, including the corresponding headers:
before do
  header['Access-Control-Allow-Origin'] = '*'
  header['Access-Control-Request-Method'] = '*'
end
and finally, mount our model APIs:
mount Product
mount Review
So, in summary, we should have something like this at the end:
module GrapeExampleApp
  class V1 < Grape::API
    version 'v1', using: :path, vendor: 'grape_example_app'
    # Specific content type to set UTF-8 and avoid codification problems
    content_type :json, 'application/json; charset=UTF-8'
    prefix :api
    format :json

    before do
      header['Access-Control-Allow-Origin'] = '*'
      header['Access-Control-Request-Method'] = '*'
    end

    helpers do
      def api_response response
        case response
        when Integer
          status response
        when String
          response
        when Hash
          response
        when Net::HTTPResponse
          "#{response.code}: #{response.message}"
        else
          status 400 # Bad request
        end
      end

      def authenticate!
        error!('Unauthorized. Invalid or expired token.', 401) unless current_user
      end

      def clean_params(params)
        ActionController::Parameters.new(params)
      end

    end

    mount Product
    mount Review

  end
end
Weeeeeeell... is this it? NO! Now we have to develop the model APIs. Let's see one of them (Product e.g.), and the other will be the same. Open the product.rb file under v1 folder and, first of all, add this line:
module GrapeExampleApp
  class V1::Product < Grape::API
    use Rack::JSONP
  end
end
This allows, along with the headers that we have specified in our base class, CORS requests. And with the base class helpers, let's add two more in Product class, both will be the parameters that we'll use in the requests: token and attributes.
helpers do
  params :token do
    optional :token, type: String, default: nil
  end

  params :attributes do
    optional :attributes, type: Hash, default: {}
  end
end
As we want a RESTful API, we have to implement the HTTP verbs GET, POST and PUT (for this example we're going to avoid DELETE verb). All of this has to be inside of the resource block. Let's see GET verb as example:
resource :products do
  get do
    api_response(::Product.all.to_json)
  end
end
This GET gives as response a list of products. For this request we let anyone to read the info, so we don't need to work with any token param. If we want to do a GET request only for a specific product, we have to implement the GET verb with id parameter, like so:
route_param :id do
  params do
    use :token, type: String, desc: 'Authentication token'
    requires :id, type: Integer, desc: "Product ID"
  end
  get do
    begin
      authenticate!

      product = ::Product.find(params[:id])
      api_response(product.to_json)
    rescue ActiveRecord::RecordNotFound => e
      status 404 # Not found
    end
  end
end
Here we have a little more interesting code. We have a params block, were we define the parameters that we'll handle on the request, and then the actions inside the GET. With the helper authenticate! that we have defined before, we check if the token that the user send us is valid. If so, we find the product with the id from params and pass it to api_response. If not, we raise an exception and returns this as response.
So, with GET with and without ID done, lets move on to the next point: POST and PUT. Both verbs are similar, but POST is used for create new elements, whereas PUT is used to update. POST code will be like that:
params do
  use :token
  requires :attributes, type: Hash, desc: 'Product object to create' do
    requires :name, type: String, desc: 'Name of product'
    requires :description, type: String, desc: 'Description of product'
    requires :image_url, type: String, desc: 'URL of image for product'
    requires :price, type: Integer, desc: 'Price of product'
    requires :stock, type: Integer, desc: 'Stock of product'
  end
end
post do
  begin
    authenticate!
    safe_params = clean_params(params[:attributes])
                  .permit(:name, :description, :image_url, :price, :stock)

    if safe_params
      ::Product.create!(safe_params)
      status 200 # Saved OK
    end
  rescue ActiveRecord::RecordNotFound => e
    status 404 # Not found
  end
end
This block requires more complex parameters because the user has to send us the new product info. The parameter attributes is a hash with the Product information, so we have to define it properly as we see on the code. Then, inside the post block, we do the typical 'create' things: 'clean' the request params to sanitize them, create the new product, and respond with success if is the case.
The same goes on PUT, but with the ID param in order to be able to find the product to update:
params do
  use :token, type: String, desc: 'Authentication token'
  requires :id, type: Integer, desc: "Product ID"
  requires :attributes, type: Hash, desc: 'Product object to create' do
    requires :name, type: String, desc: 'Name of product'
    requires :description, type: String, desc: 'Description of product'
    requires :image_url, type: String, desc: 'URL of image for product'
    requires :price, type: Integer, desc: 'Price of product'
    requires :stock, type: Integer, desc: 'Stock of product'
  end
end
put ':id' do
  begin
    authenticate!
    safe_params = clean_params(params[:attributes]).permit(:name, :description, :image_url, :price, :stock)

    if safe_params
      product = ::Product.find(params[:id])
      product.update_attributes(safe_params)
      status 200 # Saved OK
    end
  rescue ActiveRecord::RecordNotFound => e
    status 404 # Not found
  end
end
And that's it! We have our model APIs files completed. Putting all together results in something like:
module GrapeExampleApp
  class V1::Product < Grape::API
    use Rack::JSONP

    helpers do
      params :token do
        optional :token, type: String, default: nil,
        documentation: {
          type: 'String',
          desc: 'Authenticate token'
        }
      end

      params :attributes do
        optional :attributes, type: Hash, default: {},
        documentation: {
          type: 'Hash',
          desc: 'Params attributes of product'
        }
      end
    end

    resource :products do
      get do
        api_response(::Product.all.to_json)
      end

      route_param :id do
        params do
          use :token, type: String, desc: 'Authentication token'
          requires :id, type: Integer, desc: "Product ID"
        end
        get do
          begin
            authenticate!

            product = ::Product.find(params[:id])
            api_response(product.to_json)
          rescue ActiveRecord::RecordNotFound => e
            status 404 # Not found
          end
        end
      end

      params do
        use :token
        requires :attributes, type: Hash, desc: 'Product object to create' do
          requires :name, type: String, desc: 'Name of product'
          requires :description, type: String, desc: 'Description of product'
          requires :image_url, type: String, desc: 'URL of image for product'
          requires :price, type: Integer, desc: 'Price of product'
          requires :stock, type: Integer, desc: 'Stock of product'
        end
      end
      post do
        begin
          authenticate!
          safe_params = clean_params(params[:attributes])
                        .permit(:name, :description, :image_url, :price, :stock)

          if safe_params
            ::Product.create!(safe_params)
            status 200 # Saved OK
          end
        rescue ActiveRecord::RecordNotFound => e
          status 404 # Not found
        end
      end

      params do
        use :token, type: String, desc: 'Authentication token'
        requires :id, type: Integer, desc: "Product ID"
        requires :attributes, type: Hash, desc: 'Product object to create' do
          requires :name, type: String, desc: 'Name of product'
          requires :description, type: String, desc: 'Description of product'
          requires :image_url, type: String, desc: 'URL of image for product'
          requires :price, type: Integer, desc: 'Price of product'
          requires :stock, type: Integer, desc: 'Stock of product'
        end
      end
      put ':id' do
        begin
          authenticate!
          safe_params = clean_params(params[:attributes]).permit(:name, :description, :image_url, :price, :stock)

          if safe_params
            product = ::Product.find(params[:id])
            product.update_attributes(safe_params)
            status 200 # Saved OK
          end
        rescue ActiveRecord::RecordNotFound => e
          status 404 # Not found
        end
      end
    end

  end
end
Give some authentication to the API
The authenticate! helper help us to determine if an user is valid or not via the token param. For this we need to create a model that store these tokens and associate them to application users. Because this is a simple example, we're going to do a simple model like this:
class ApiKey < ActiveRecord::Base
  before_create :generate_access_token
  before_create :set_expiration
  belongs_to :user

  def expired?
    DateTime.now >= self.expires_at
  end

  private
  def generate_access_token
    begin
      self.access_token = SecureRandom.hex
    end while self.class.exists?(access_token: access_token)
  end

  def set_expiration
    # Change the expiration range if we want
    self.expires_at = DateTime.now + 9999
  end
end
with this migration to create the table on our database:
class CreateApiKeys < ActiveRecord::Migration
  def change
    create_table :api_keys do |t|
      t.string :access_token
      t.datetime :expires_at
      t.integer :user_id
      t.boolean :active

      t.timestamps null: false
    end

    add_index :api_keys, ["user_id"], name: "index_api_keys_on_user_id", unique: false
    add_index :api_keys, ["access_token"], name: "index_api_keys_on_access_token", unique: true
  end
end
We only have to assign an user when we create a new ApiKey. With that done, we only have to add a fourth helper in our v1 base class on the API.
def current_user
  # Find token. Check if valid.
  token = ::ApiKey.where(access_token: params[:token]).first
  if token && !token.expired?
    @current_user = ::User.find(token.user_id)
  else
    false
  end
end
Voila! We have a simple authentication via token :)
Documenting the API with Grape Swagger
As the last step of all this, and because we love our users, let's do some documentation (simple, but documentation at the end). For this we'll use the Grape Swagger gem. Again, all the detailed documentation about Grape Swagger is on their website, but let's see a simple and fast example. First of all, add this to our Gemfile and do bundle install:
gem 'grape-swagger'
gem 'grape-swagger-rails'
Next, complete the description and detail of every verb on our API, specifying this on desc and detail blocks, e.g., the Product POST:
desc 'REST Post with attributes param.' do
  detail <<-NOTE
      Creates a product with the information passed through attributes param.
      -----------------

      This is a hash, with the estruture:

      ```
        {"name": "Example", "description": "Description example", "image_url": "url", "price": 30, "stock": 4}
      ```
    NOTE
end
params do
  use :token
  requires :attributes, type: Hash, desc: 'Product object to create' do
    requires :name, type: String, desc: 'Name of product'
    requires :description, type: String, desc: 'Description of product'
    requires :image_url, type: String, desc: 'URL of image for product'
    requires :price, type: Integer, desc: 'Price of product'
    requires :stock, type: Integer, desc: 'Stock of product'
  end
end
post do
  begin
    authenticate!
    safe_params = clean_params(params[:attributes])
                  .permit(:name, :description, :image_url, :price, :stock)

    if safe_params
      ::Product.create!(safe_params)
      status 200 # Saved OK
    end
  rescue ActiveRecord::RecordNotFound => e
    status 404 # Not found
  end
end
On our v1 base class, add this helper with the options we want (the meaning of the options I put here are detailed on the official documentation):
add_swagger_documentation(
  api_version: "v1",
  hide_documentation_path: true,
  hide_format: true,
  markdown: GrapeSwagger::Markdown::RedcarpetAdapter
            .new(render_options: { highlighter: :rouge })
)
And finally we have to create an initializer for the gem. On config/initializers folder, create the file grape_swagger_rails with this content (or with the options we want based on the Grape Swagger documentation):
GrapeSwaggerRails.options.url      = "api/v1/swagger_doc"
GrapeSwaggerRails.options.app_name = 'Grape Example'
GrapeSwaggerRails.options.app_url  = '/'
and mount our documentation in routes.rb:
mount GrapeSwaggerRails::Engine, at: "/documentation"
After documenting our APIs properly, if we start our application and we go to http://localhost:3000/documentation, we should see something like what is seen in the following screenshots:
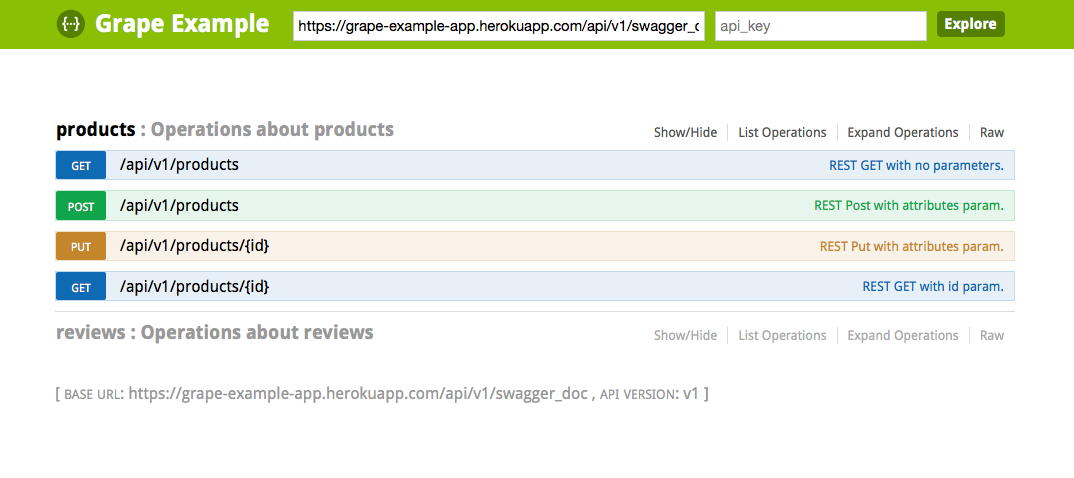
Grape Swagger index with Product actions list expanded
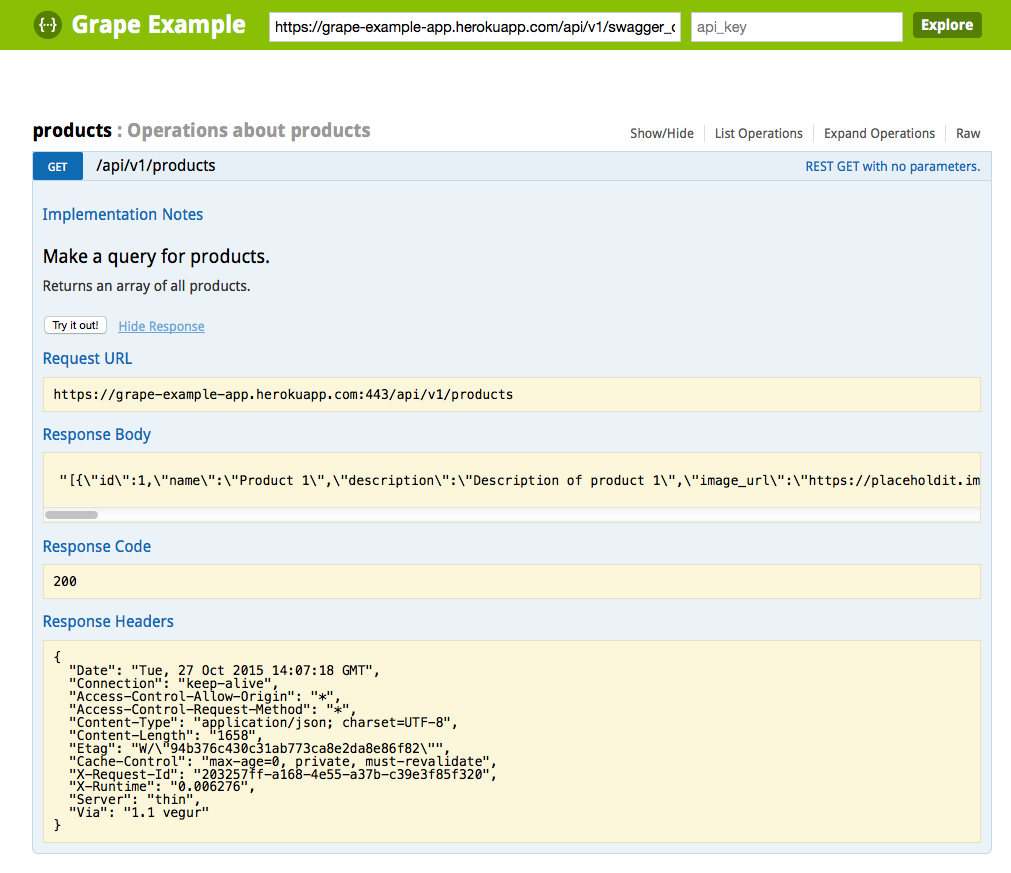
GET call for Product model
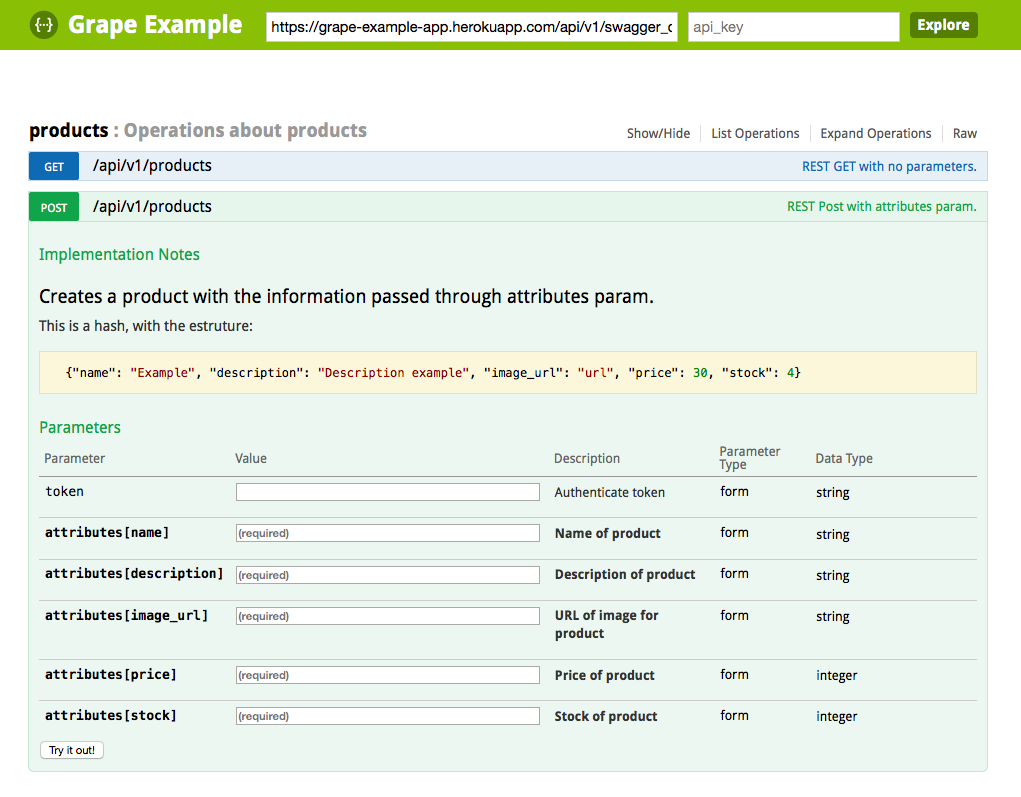
POST call for Product model
I may have gone a little slower explaining the process and could have gone into more detail on certain points, but with this post I wanted to show you a simple example so you can play with him and investigate the details of it with the official documentation of everything used in the example.
Ok, now... yessssssss! Finally, after 'hours' of hard work and tears, we have our super fancy Rails API, so deal with it, internet!

Any place where I can see the result?
Yeah! Here you have the Github repo for this example, so you can clone it, change it, play with it... whatever you want! :)
If you don't want to play with the example repo, here you have a working example mounted on Heroku.